You may wonder why it is important to pack your hiking backpack in a certain way. Here are four benefits of learning the tricks of how to pack […]
SHARE:
You may wonder why it is important to pack your hiking backpack in a certain way. Here are four benefits of learning the tricks of how to pack your hiking backpack the correct way:
Comfort: A properly packed backpack will distribute weight evenly across your body, making it more comfortable to carry. It can help prevent sore shoulders, aching back, and other discomforts associated with carrying a heavy load.
Safety: A well-packed backpack is less likely to shift or become unbalanced while hiking, which can reduce the risk of accidents or injuries. If your pack is too heavy or not balanced properly, you may lose your balance, slip, fall, or even injure yourself.
Accessibility: A properly packed backpack will make it easier to access the items you need when you need them. For example, if you need to quickly access your first aid kit or rain gear during a sudden storm, you don’t want to have to dig through layers of gear to find them.
Efficiency: A well-packed backpack will help you hike more efficiently. If your pack is packed properly, you’ll have an easier time hiking over rugged or steep terrain, and you’ll be less likely to get tired or fatigued.
Overall, packing your hiking backpack correctly can make a big difference in your comfort, safety, and enjoyment while hiking.
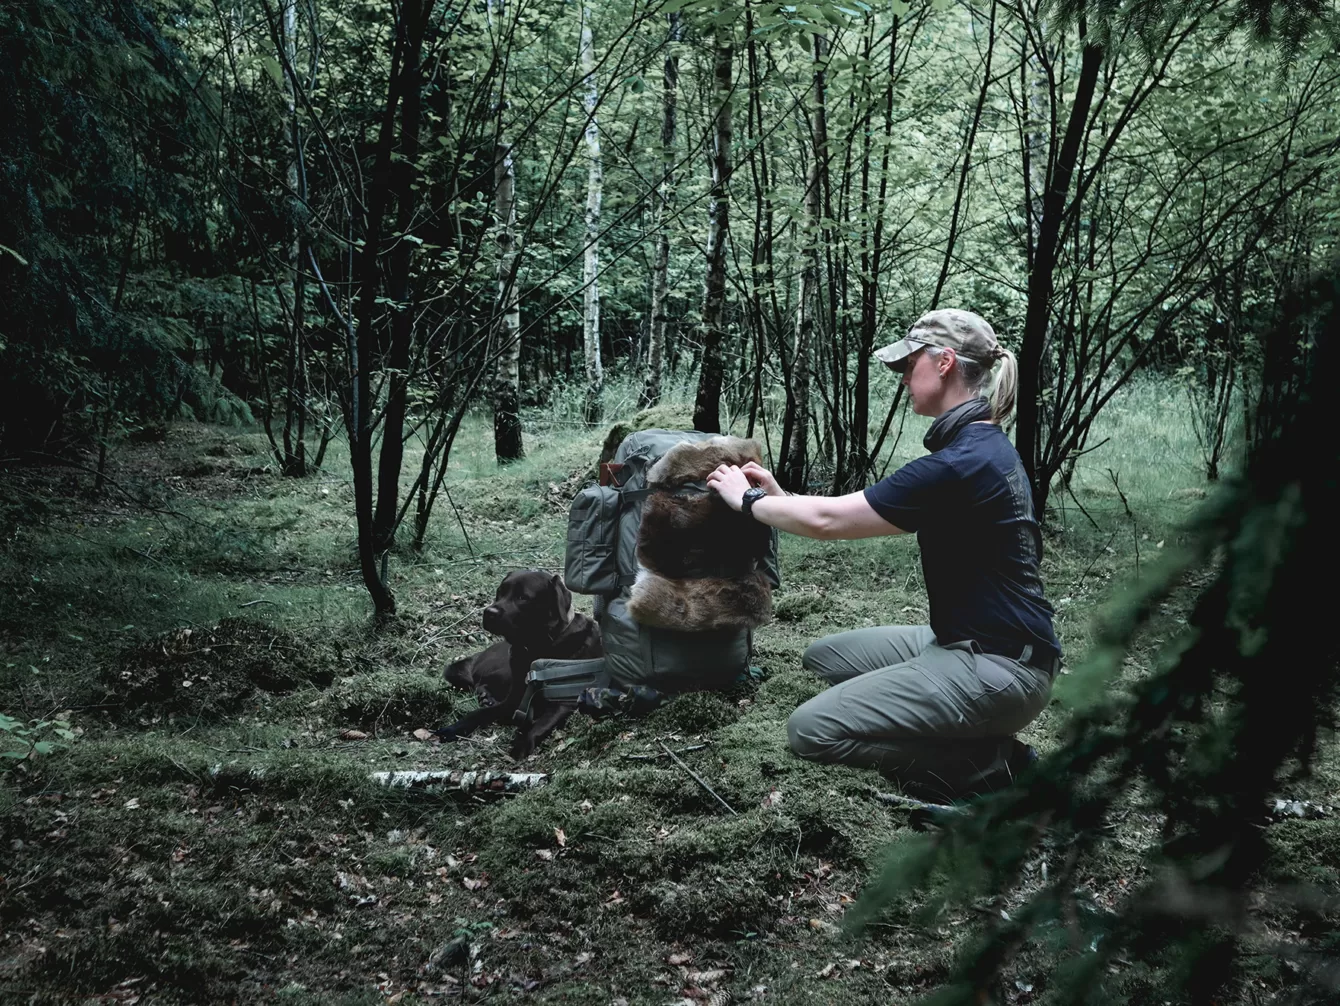
“I have a fixed system of which gear is in which pocket, so that I can access it immediately, even in poor light conditions.” – Bushcraft Alli
Choosing the right sized backpack
When selecting a backpack, it’s important to consider your mission, the duration of your outing and, of course, your torso length. The first two factors will also help you determine both the necessary gear to bring and the appropriate size of backpack (size is often labelled in either liters or hours).
It’s important to note that backpack size is not just based on torso length but also on the capacity you need for your gear. It is hard to give guidelines about how heavy your backpack should, this is all depending on your body weight and how long a hike you are doing. Some sources say your backpacking pack should not weigh more than about 20% of your body weight.
So, once you know your torso length, you can narrow down your options based on the backpack’s capacity and the weight of the gear you plan to carry. Do you want to know more about what capacity your backpack should have, read our Rush Backpack Capacity Guide.
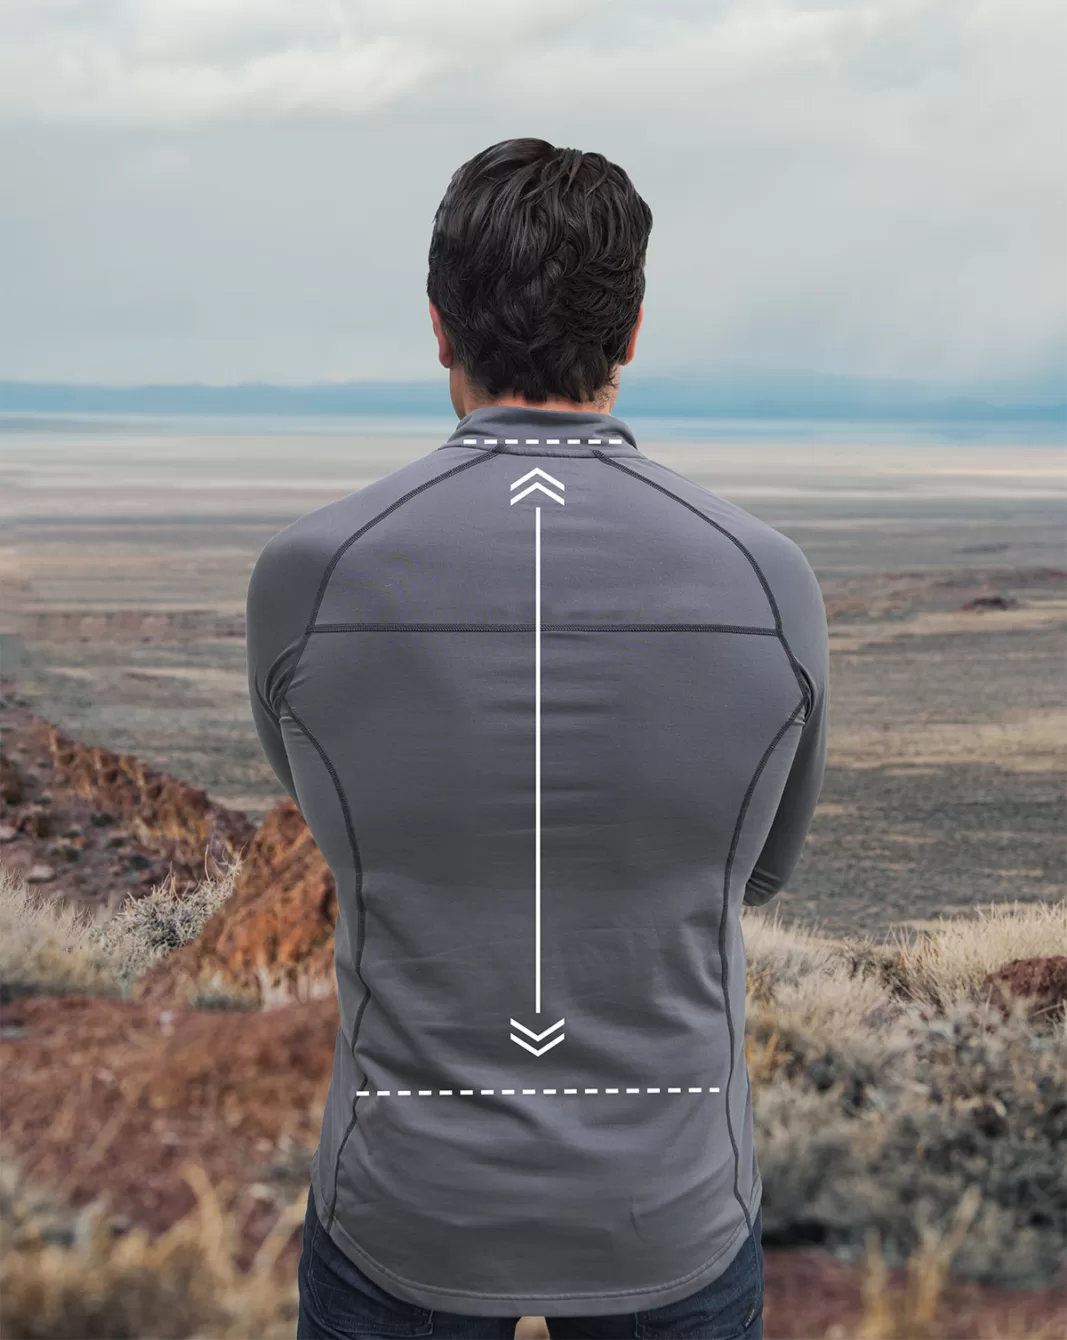
How to measure your torso length
To find a backpack that is the right size for your torso length you need to start by measuring your torso.
Place your hand on the back of your neck, tilt your head down to locate your C7 vertebrae (this will be the most prominent bone protruding from the back of your neck). Measure from the base of your neck (C7) to your Iliac crest (the top of your hip bone) to find your toro length. This is also much easier if you ask someone to help you measure.
How to pack your hiking backpack:
As for all missions, preparation and planning is also key for a successful hike or trek. Experienced backpackers usually have a packing system to keep their gear very organized. If you are a beginner, here are some useful steps for you to follow when packing your hiking backpack:
Loosen all compression straps on your backpack.
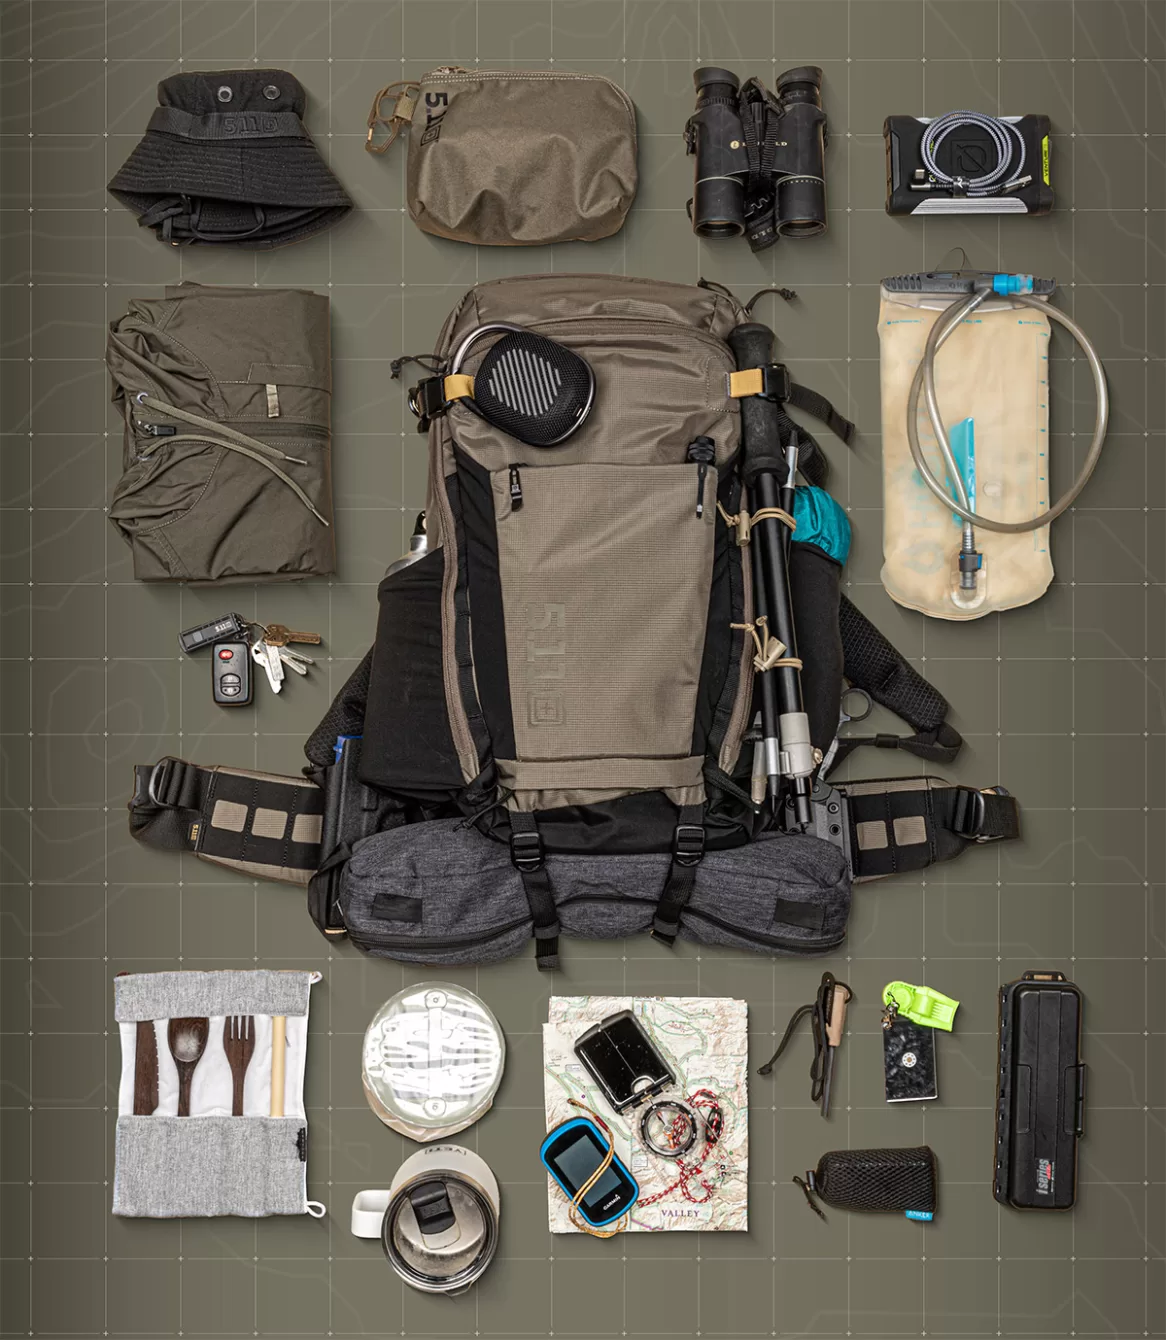
Lay out all gear on the floor to get an overview of what you are bringing.
Fill your hydration system and place it by your backpack
Organize your gear. Group similar items together and organize them by importance or frequency of use.
Are you packing something in stuff sacks or dry bags? Now is the time to do it.
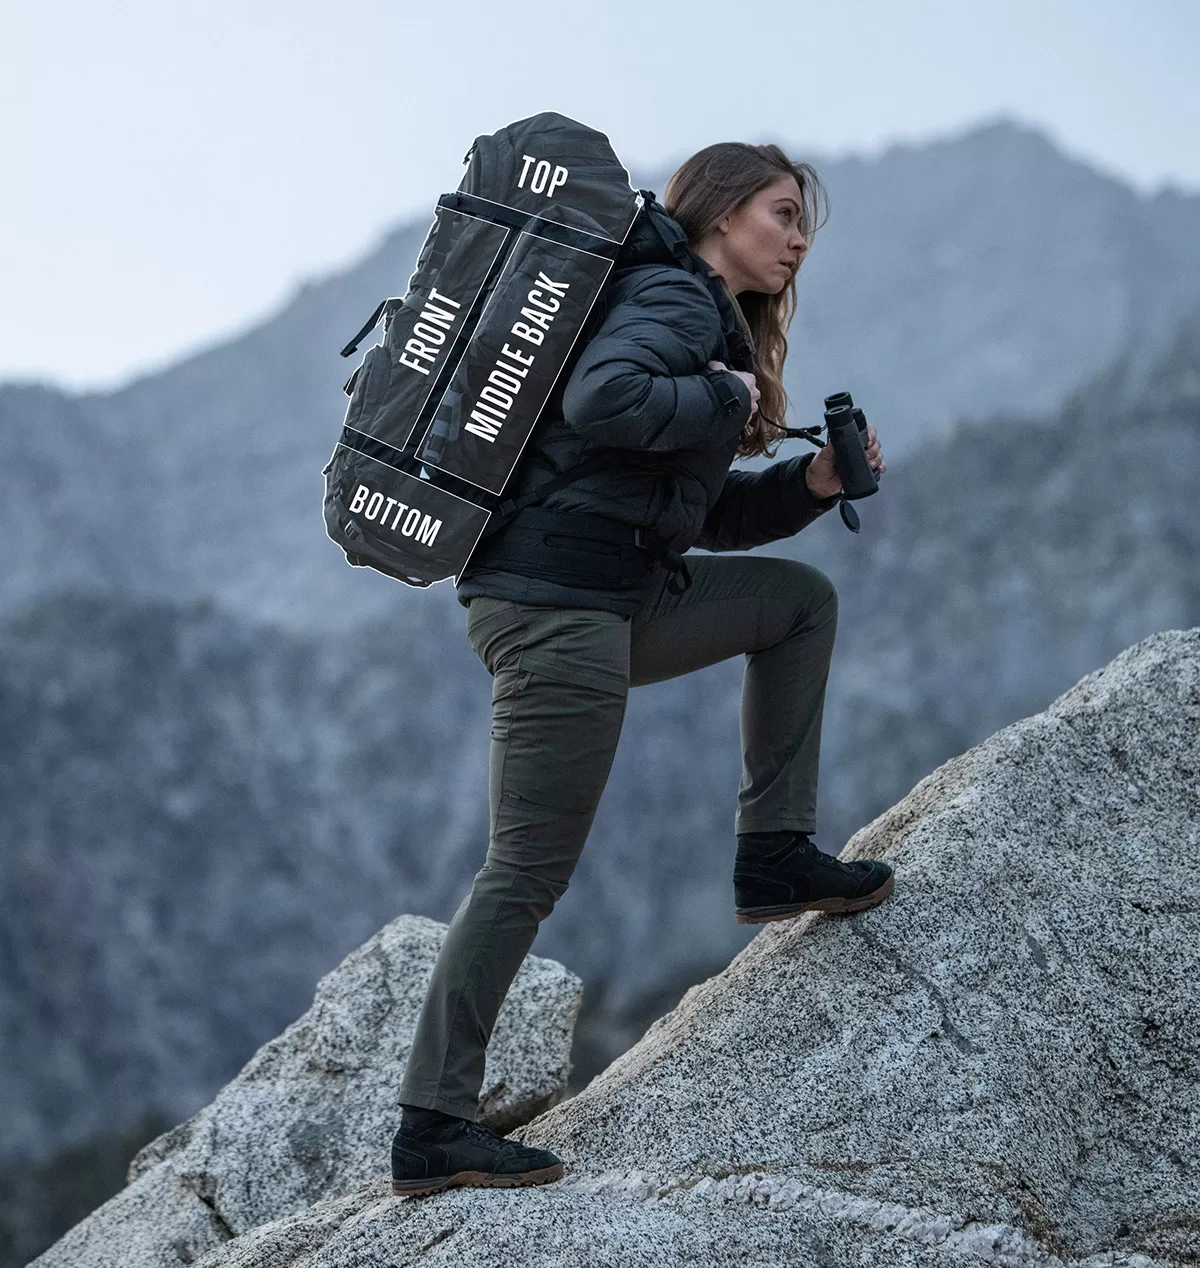
Backpack zones
Your backpack can be divided into zones; bottom, middle back, front and top. When packing, you build from the ground up, putting bulky items on the bottom, heavy items in the middle back, and light items at the top and front of your pack. This configuration creates stability, is best for your back and is usually easiest to carry, especially if you’re making a long trek.
The foundation: Packing the bottom of your bag
The bottom of your pack is for your bulkiest gear and gear you only need to access when you’re done carrying it for the day. Your sleeping bag goes in first, then fill out the space with additional clothing you are bringing.
The middle back area
This is where your heaviest gear goes. Packing the heaviest gear close to your body will give stability to your backpack, and yourself. Cookware, hydration reservoir, food and tent body go in the middle back section of your backpack.
The Front
Opposite from the middle back, the front is furthest from your body and should carry your lightest gear, such as lightweight clothes, towels and small toiletries. Use clothes and soft items to secure hard gear placed at the middle back area.
The top of your pack
The top of your backpack is for light items you need easy access to. Things like first aid kit, rain poncho, navigation gear, snacks and water purification tablets/filters are perfect to pack in the top space of the backpack and the lid (also known as the pack’s brain).
What to put in the side pockets, hip belt and gear loops
Usually, your hiking backpack has other storage and packing possibilities like side pockets, a hip belt pocket, front pouch, and gear loops. Those easy-to-reach pockets are perfect for smaller gear like lip balm, a headlamp, bug spray and an easily accessible water bottle.
Gear loops and compression straps can be used to attach tent poles, an axe, climbing ropes, trekking poles, large sleeping pad and other items that don’t really fit in the backpack. But beware – too many hanging items on the outside of your pack might cause problems by catching on tree branches or just creating annoying sounds when you walk.
All done packing? Tighten the compression straps to secure the load.
Things to avoid when packing for a hike
When packing your hiking backpack, there are several things you should avoid to ensure that you have a safe and comfortable hiking experience. Here are a few big no-nos when packing your backpack:
Overpacking: The weight of your backpack can have a significant impact on your comfort and energy level while hiking. Stick to the essentials and pack only what you need.
Packing heavy items on top: Avoid packing heavy items on top of your backpack, as this can make it difficult to balance. It can also cause strain on your shoulders and back. Heavy gear should be packed in the middle back of your backpack.
Folding your clothes: Rolling your clothes when packing is a simple but often overlooked technique that can significantly reduce the volume of your equipment.
Wasting space: Stuffing your rolled-up socks into your shoes will not only help you make the most of the often-underutilized space inside your shoes, but it also keeps your socks organized and easy to find.
Ignoring the weather forecast: Check the weather forecast before you start packing. This will help you determine what type of clothing and gear you need to bring.
Forgetting to pack essential items: Make a checklist of all the items you need to bring and double-check that you have everything before you leave.
Using an ill-fitting backpack: Make sure your backpack fits properly and is adjusted to your body. A poorly fitted backpack can cause discomfort and may even lead to injury.
Prepare for unexpected weather changes
Most of us probably hope for great weather when planning our outdoor excursions. But, as we all know, the weather is sometimes unpredictable. Preparing for an unexpected weather change might prove to be a stroke of genius. Here are some useful tips on how you can prepare:
Is your backpack waterproof? If not, there are products you can use to treat the nylon pack to make it more water resistant.
Consider packing a waterproof backpack cover or rainfly to protect your backpack and its contents from rain and moisture.
Pack your gear in waterproof bags or dry sacks inside your backpack.
In case of sudden weather changes, it’s a good idea to keep essentials such as rain gear, a map, and a first aid kit easily accessible. This can be accomplished by packing them at the top or in an easily accessible pocket of your backpack.
If you expect cold or wet weather, consider packing extra clothes, such as an additional base layer, a warm hat, or an extra pair of gloves. Store them in a waterproof bag or dry sack to keep them dry.
By taking these precautions, you can help ensure that your backpack and gear remain protected and easily accessible in bad weather conditions.
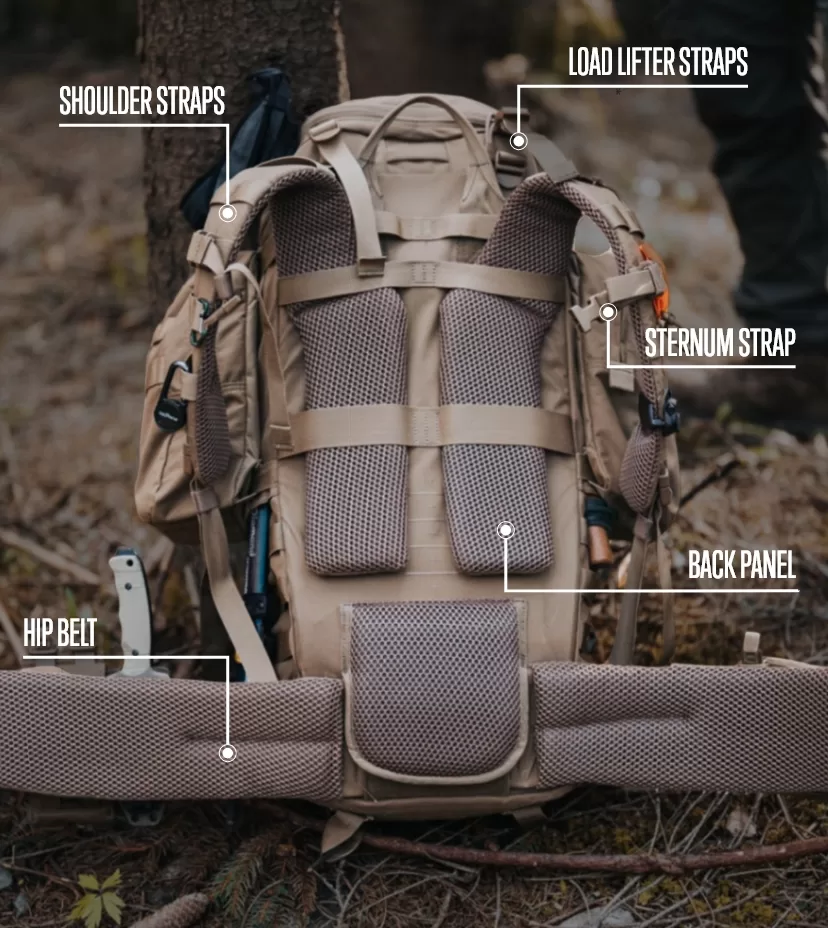
How to fit your backpack
Overall, a properly fitted backpack should feel comfortable and stable on your back, distribute the weight evenly, and allow you to move freely. Here are some guidelines to help you ensure a proper fit:
Adjust the shoulder straps. They should fit snugly against your shoulders and be wide enough to distribute the weight evenly. They should not dig into your skin or be too loose.
The hip belt should sit comfortably on your hips and be snug enough to support the weight of the backpack. It should not ride up or slide down as you walk.
The load lifter straps connect the top of the backpack to the shoulder straps and help to transfer weight from your shoulders to your hips. Adjust them to create a comfortable fit.
The sternum strap should be adjusted so that it sits comfortably across your chest and prevents the shoulder straps from slipping off your shoulders.
The back panel should be contoured to fit the natural curve of your back and provide adequate ventilation to prevent excessive sweating.
Consider your range of motion. You should be able to move your arms and legs freely without the backpack getting in the way.
Is there a right way and a wrong way to put on and lift up a heavy backpack? Well, there are certainly better and worse ways to put on a fully loaded backpack. Here are our best tips:
Tighten the compression straps and slightly loosen the shoulder straps.
Grab the haul handle/haul loop, stand the backpack upright and place yourself next to the back panel. Grab one shoulder strap with the opposite hand.
Using your core and legs, lift the backpack onto your thigh with the shoulder straps facing you.
Hold the haul handle with one arm and slip the other arm and shoulder through the shoulder strap until the padding cradles your shoulder.
Lean forward and (without letting go of the haul handle) lift the backpack on to your back and slide the other arm through the remaining shoulder strap.
Buckle the hip belt and then adjust your shoulder straps.
And that’s it! Now you are ready for the hike of your life.
Now that you know how to pack your backpack for a hike, you can feel confident and prepared for your next adventure. With careful planning and organization, you can ensure that you have all the necessary gear to enjoy the trail ahead. Take a moment to appreciate the weight of your backpack, knowing that it contains everything you need for a safe and enjoyable trip.
The birth of cargo pants was not about fashion, but function. Specifically, the military function. Their design included ample pockets for soldiers to carry their gear.
Cargo pants have experienced a noteworthy metamorphosis since their original conception. Initially invented in the early 20th century for the military with the intention to provide soldiers with an ample amount of storage for gear and ammunition, these pragmatic trousers have since migrated into the realm of fashion, carving out a unique niche for themselves.
In honor of International Women's Day, we’re excited to spotlight some of the incredible women who have served or currently serve in the military or public service here at 5.11 Tactical.
Having the proper footwear is absolutely critical for professionals in intense, demanding roles like the military, law enforcement, and outdoor enthusiasts.
Whether you're a professional in law enforcement, military, or an outdoor enthusiast, this guide will equip you with the knowledge to make an informed decision and get the most out of your black cargo pants.